Setup Your Custom Twitch AI Chatbot Account with Algochat: A Step-by-Step Guide
Easily set up a Twitch AI chatbot using your own custom account identity with Algochat. Follow our step-by-step guide to get your tokens and configure your bot for a safer, more authentic stream chat.
Want a Twitch AI Chatbot Using Your Own Account?
We're excited to show you how Algochat enables you to use your own custom Twitch accounts for our AI chatbots! This powerful feature allows your Twitch AI chatbot to operate under an account name you choose, enhancing its authenticity on your channel.
Using your own account means you can better manage chat restrictions, like enabling follower-only or subscriber-only modes, aligning the bot's capabilities with your channel's rules. At Algochat, our goal is to provide the most realistic and secure Twitch chatbot experience possible.
This guide will walk you through the simple process of setting up your custom Twitch chatbot account.
Step 1: Preparing Your Custom Twitch Account
Before integrating with Algochat, your chosen Twitch account needs a couple of things. We'll need four key pieces of information later on:
- Username: The Twitch login name of the account you want the bot to use.
- Client ID: An identifier for the application requesting access.
- Access Token: Grants permission for the bot to act on behalf of the account.
- Refresh Token: Used to obtain new Access Tokens when the old ones expire.
Important Note on Account Verification: Make sure the Twitch account you intend to use for your chatbot has phone number verification enabled. Based on our testing, Twitch often requires this verification to allow accounts to send chat messages reliably after the first week or two of creation. This helps ensure your Twitch AI chatbot operates smoothly without interruptions.
Step 2: Generating Your Twitch Bot Credentials
To get the necessary tokens for your custom Twitch bot, follow these steps carefully:
-
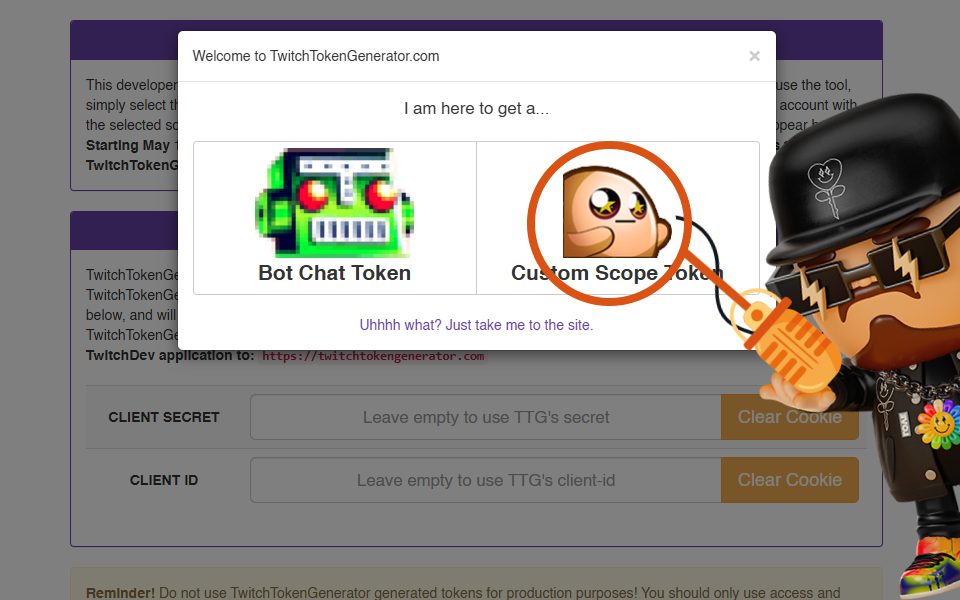
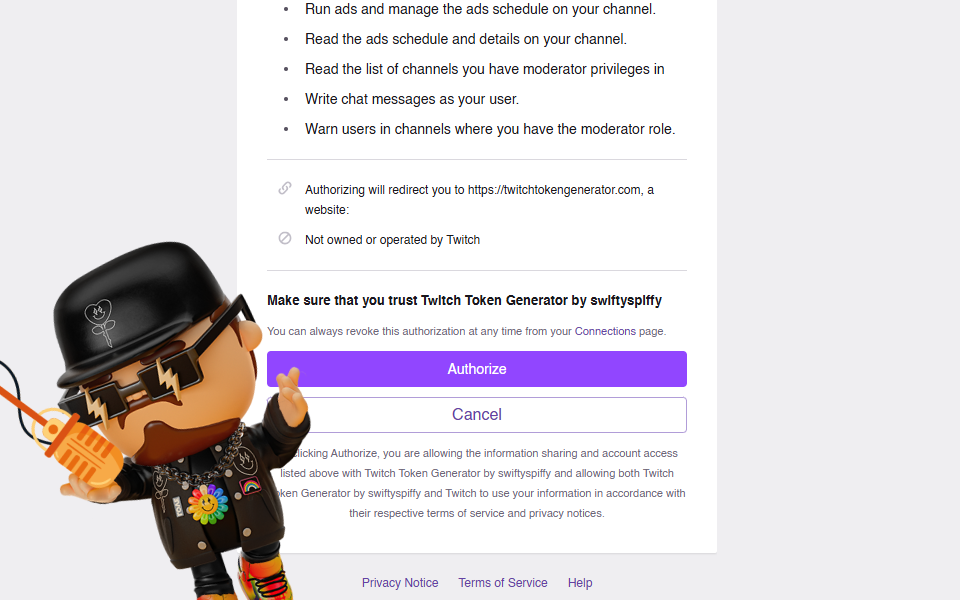
Go to the Twitch Token Generator website. Select the option for a "Custom Scope Token". This allows you to define the specific permissions your bot needs.
-
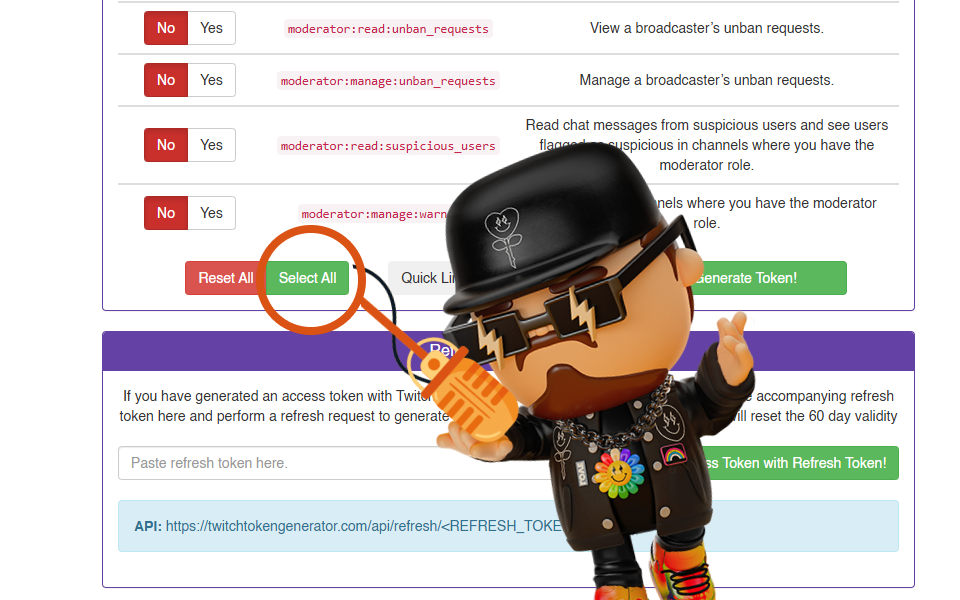
Scroll down the page to the permissions list. Click the "Select All" button to grant all necessary permissions for full chatbot functionality.
-
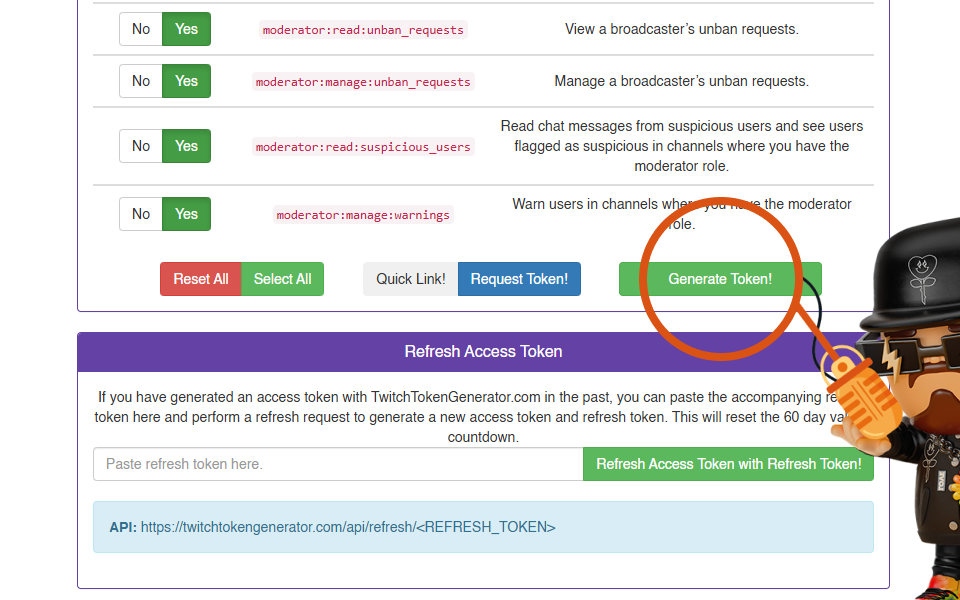
After selecting the scopes, click the "Generate Token!" button at the bottom.
-
You will be redirected to Twitch.tv to authorize the application.
- If you are already logged into the desired Twitch account in your browser, simply click "Authorize".
- If you are logged into a different account, log out of Twitch first, then log in with the account you want your Twitch chatbot to use before clicking Authorize.
-
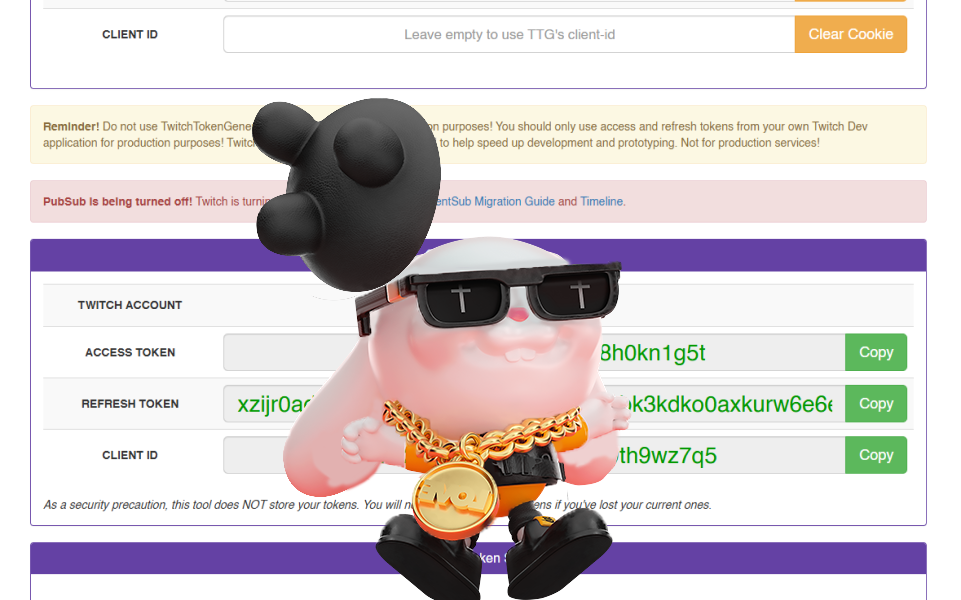
After authorization, you'll be sent back to the Twitch Token Generator site. Carefully copy the following details – you'll need them for the next step in the Algochat dashboard:
- Access Token
- Refresh Token
- Client ID
Step 3: Adding Your Custom Account to Algochat
Now, let's connect your prepared account to Algochat:
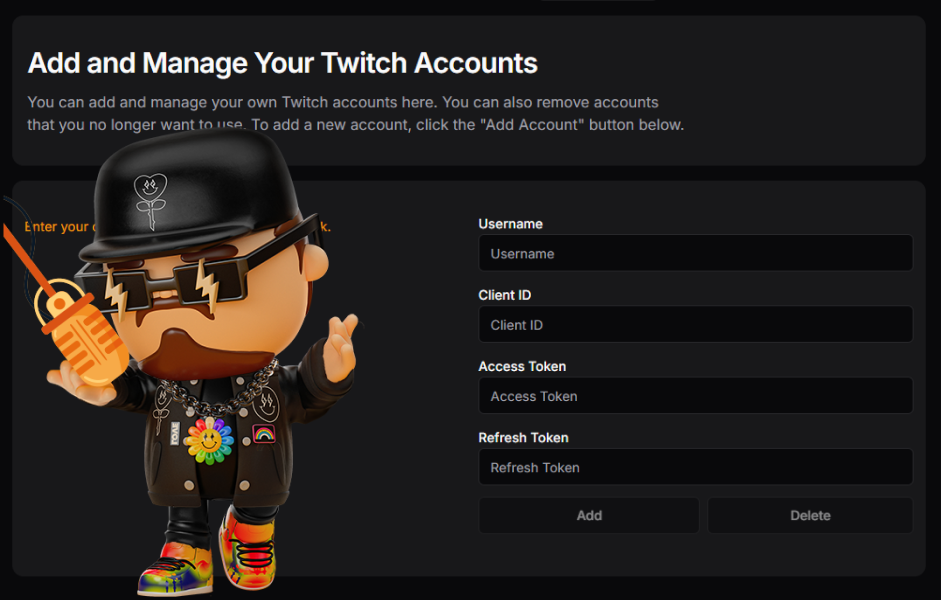
- Log in to your Algochat account and navigate to: Dashboard → Services → Twitch → User Accounts.
- On this page, you will find fields to enter the Username, Client ID, Access Token, and Refresh Token that you gathered in Step 2.
- Enter the information accurately into the corresponding fields.
- Once submitted, Algochat will automatically test the credentials to ensure they work. Our system will also securely store them and handle refreshing the tokens automatically before they expire, ensuring uninterrupted service for your Twitch AI chatbot.
You can manage your connected accounts on this page anytime – add more accounts or edit existing ones as needed. Enjoy your new, personalized Twitch chatbot experience with Algochat!

